How to add a Chatbot Agency Messenger Chatbot to your website
How to add a Messenger chatbot to your website
Users not only use Messenger to keep in touch with family and friends! It’s also becoming one of the easiest, most effective ways for users to keep up to date with their favourite products and services. Because of this, businesses should make the most of the ability to communicate with their audiences via messenger - whether it be to inform about their brand, discuss products and services, or offer customer support!
According to a Meta study; 53% of consumers are more likely to shop with a business they are able to message! Those are pretty good numbers.
With a Messenger chatbot installed, your business can be optimised for customer connections 24/7. The best thing about your Messenger chatbot, is it can also be used in other places, such as your website! There are multiple benefits to running your Messenger chatbot on your website, we’ll go over a few; and show you how to set it up on the Chatbot Agency platform!
How does a Messenger chatbot work on a website?
Messenger chatbots are computer programs that can simulate human conversation. They are commonly used on websites to provide customer service, or to lead customers through a sales process. Chatbots can understand and respond to natural language, which makes them an efficient way to communicate with customers. When used properly, chatbots can improve the customer experience on a website.
Messenger is home to 2.9 billion active users. These users are comfortable and familiar with using Messenger and it’s interface already - so let’s keep them happy, and use our Messenger chatbot on our website! After adding your Messenger chatbot to your website, the logo will appear for users to click on and open a conversation with your Messenger bot directly on your website.
With the Chatbot Agency platform, you can use Messenger automation for different goals, depending on your businesses needs!
Who should add a Messenger chatbot to their website?
A Messenger chatbot has various uses - but by far, two of the most popular are to automate FAQs and product recommendations to potential customers.
Here are some common uses of website chatbots for different businesses and industries:
- Beauty Salons: Take appointments and bookings
- Non-profits: Fundraising
- eCommerce sellers: Sell more products and recommend certain products
- Influencers and coaches: Communicate with audiences more clearly
- Medical Practice: Book appointments, take client information and update patients
- Real Estate: Showcase properties, find potential buyers and sellers, lead-generation
You can make all interactions with every person who visits your website meaningful. Share information, answer questions, recommend products, and guide visitors through a conversion.
How to set up a Messenger chatbot on your website
Head to the Chatbot Agency platform and login! We’ll talk you through the steps of adding your Messenger Chatbot to your website below.
1. Once logged in to the Chatbot Agency platform, head to Messenger Chatbots and then select the Messenger chatbot you wish to be adding to your website.
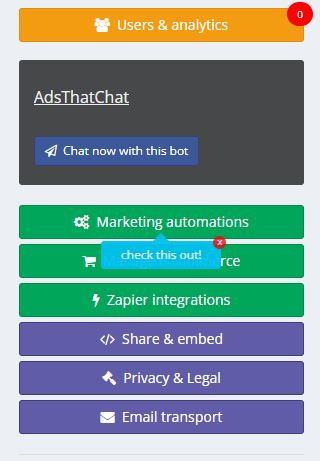
2. Once in Manage this chatbot, head to the right-side column of tabs and select Share & embed.
3. You will be taken to the Links and embed codes page for your chatbot. In this page, you will find the QR code for your chatbot, the Facebook Messenger button plugin, and more. But we want to select the top right hand side option, Customer Chat Plugin.
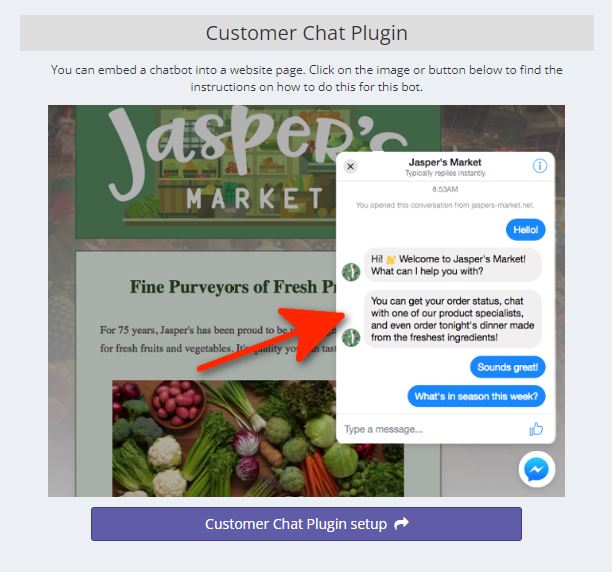
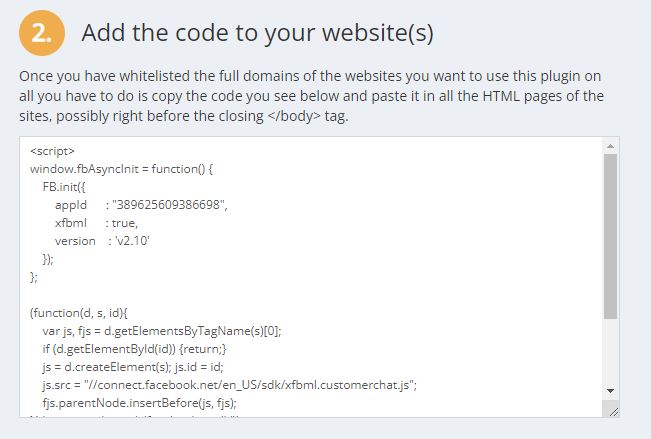
4. Now you are in the Customer Chat Plugin extension tool. You will see there are a few things to note. Firstly, the website you are installing the Messenger chatbot plugin on must be a whitelisted domain within Facebook. We have a handy button underneath this prompt that will take you directly to your Advanced Messenger Settings.
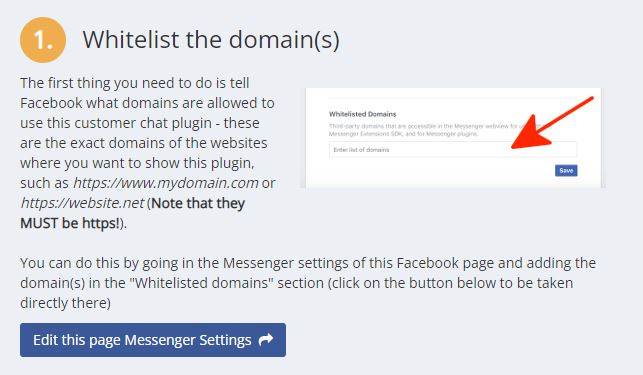
5. Once in Advanced Messenger Settings; scroll down until you see Whitelisted Domains. Here is where you will enter the FULL URL of your designated website homepage. Make sure you save, and then exit back to the Chatbot Agency Customer Chat Plugin page.

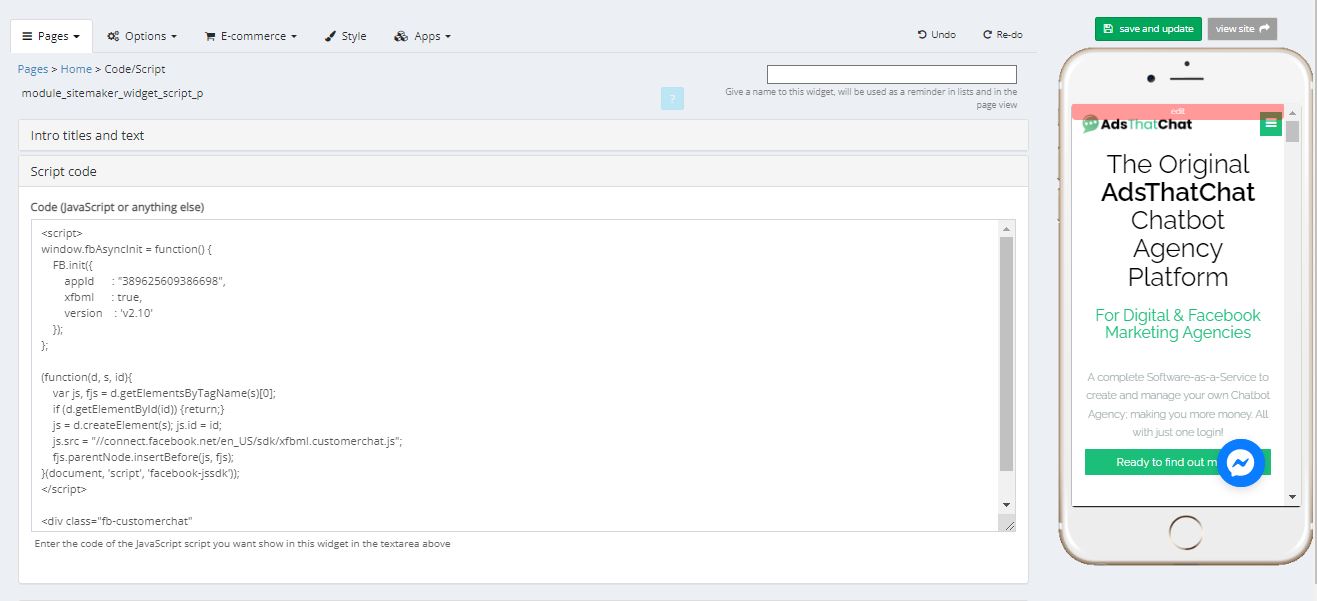
6. The next step, as outlined on the page, is to add the CSS code provided within the box frame to your website. Depending on your website, this may be a job for you, or whoever updates your website.
If you’ve built your website on the Chatbot Agency website builder; this is super easy to do! Just navigate to Mobile & Desktop Sites, select your desired website and webpage; and then add the CSS as a widget! Save and update, and you’re good to go!
7. Once the CSS code has been added to your website, you should be able to see the Messenger chat icon on your homepage, in the bottom right-hand corner.
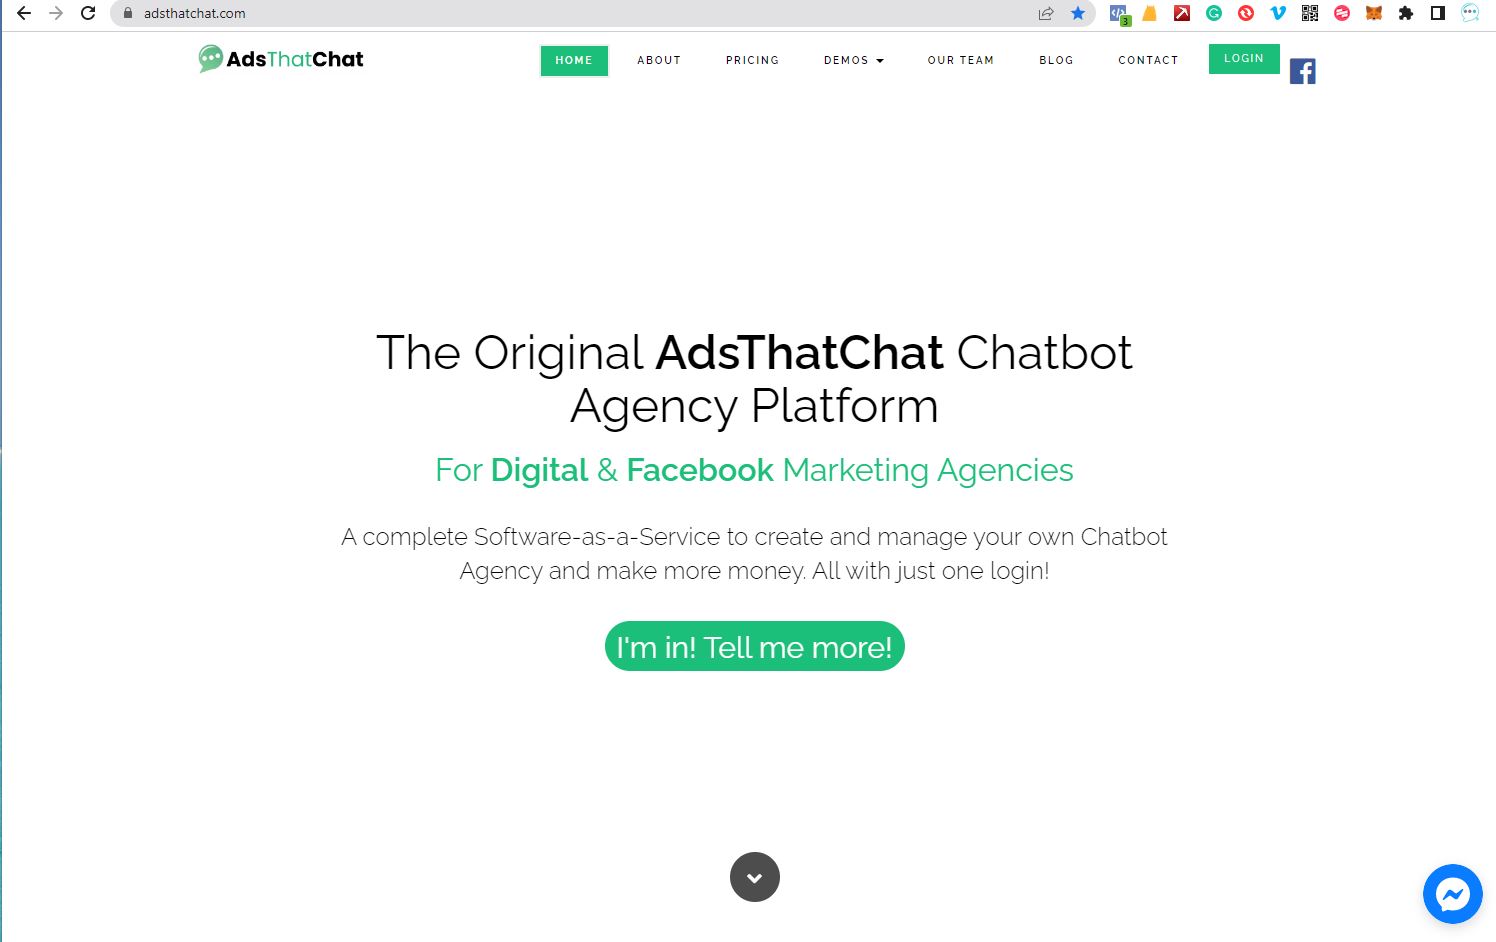
8. Make sure to click on the icon and test a chat with your chatbot to make sure everything is working perfectly!

IMPORTANT NOTE: Having a Persistent Menu installed in your Messenger Chatbot is crucial to make this a seamless experience for your visitors!
If you don’t already have a Persistent Menu in place, see our last blog post for help on how to set one up using the Chatbot Agency platform!
Congratulations! You have now added a Messenger chatbot to your website!
Woohoo, you did it!
Having a Messenger Chatbot on your website is better than a separate web chatbot for a few reasons...
One is familiarity. Customers know and trust Messenger to provide them with a seamless chatting experience.
The second, is that all of your analytics for your chatbot interactions are in the one place.
Lastly is of course that there are so many extra features Facebook has built for Messenger Marketing - and that’s why the Chatbot Agency platform exists! We are mobile-first and Facebook-friendly!
If you need help getting your Chatbot Agency Messenger Chatbot onto your website, get in touch with us today!